- Photogrammettry
- Space Design
- Augmented Reality
These three parts used skills that I have learnt and applied over this particular elective. I felt that this would be the best way for me to mash all the aspects of the course together. My ultimate project parameter was to design spaces for a object to be placed in which could be viewed through augmented reality. Due to the fact that this technology is so new it was a constant journey of learning and understanding.
PHOTOGRAMMETTRY


Above sceenshots taken from the website photosynth.com. Here I uploaded images of my object in this case being Christ the Redeemer. The website generates point clouds which are then used to create a model mesh.


Above screenshots are taken from MeshLab. I used the photosynth toolkit to generate the point cloud from the website. After bringing the point cloud into MeshLab I then was able to create a mesh therefore giving me a 3d model object, which i can then use. I tried to apply texture to the mesh and export a texture image to use later in 3dsMax. I was able to export the texture image but when I applied it to my model in 3ds it did not come out as I expected. It was not as detailed as I would have hoped. This could be due to many factors ones which I am unaware of or don't know how to fix because of me not knowing the new technology fully.


Above is an image comparison of the the original statue and the statue generated from photogrammettry. Although the image did not come out exactly like the original it has the same scale, shape and form. I liked the abstract feel which would be relevant to a sculpture in a art museum. This particular idea is what I was going for. The ability to generate a model from images has enormous potential and I think with advancing technologies and programming that it will only become easier and more accurate. Coming from an architects point of view I can see endless opportunities in how I could apply this particular technology.
SPACE DESIGN
This part of my assignment revolved around creating spaces for my photosynthed object to be placed in. The basis for my space designs was influenced on several factors these being; how they can be viewed in augmented reality, how they are going to be placed on markers, what are they spaces trying to convey and what are some existing spaces that can be used as reference.
I started gaining ideas from looking at precedents. Here are a few below;

Art of Americas Wing at the Museum of Fine Arts, Boston - Foster + Partners

Espacio de las Santa Cruz,Tenerife, Spain - Herzog&de Meuron

Espacio de las Santa Cruz,Tenerife, Spain - Herzog&de Meuron

Mixed greens gallery NYC

Nanjing Art Museum - KSP Jurgen Engel Architekten

National Museum of Underwater Archaeology - Esttudio Vazquez Consuegra

North Carolina Museum of Art - Thomas Phifer

Queens library at Hunters Point - Steven Holl Architects

Research Library in Hradec Kralove - Projektil Architekti

The light catcher at Whatcom - Olson Kundig Architects

University of Michigan art gallery expansion
After getting some ideas from these precedents, the next stage was the sketching and design process. Below are some scans of sketches that I produced to help finalise my marker display design and some of my space designs...


After doing some sketches I then turned to modelling some of these ideas in 3dsMax. I had never used 3dsMax before undergoing this elective, I found it to be very educational and a great tool which can be used in my final year at uni. Due to the fact that I had never used this program before it took me a little while to get started and some simple things took me longer then they should have because I had never done them before. The fact that I had never used the program before limited me in my design potential slightly, but I thought of it as an excuse to learn the software as it is a very powerful program which I can certainly use in the future.
Space 1
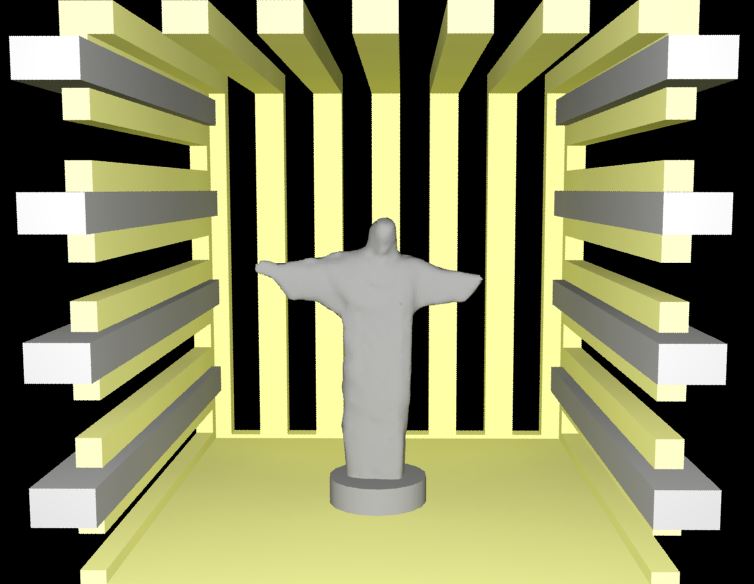

The first space I designed was my initial attempt at creating a space in 3dsMax. The horizontal lines draws the observer into the space. I placed a light on the open face of the box to reveal the statue within.
Space 2


The second space I created I was trying to achieve a dimmer more gloomy space with light being filtered through the horizontal gaps on the boxes sides and dispersed through the set down roof. At this stage I began to add texture to some of the surfaces, the surfaces reflect the feeling of the space.
Space 3


The third space I created has an elevated statue which I have placed a light underneath, this was done to show the power the statue has in relation to the surrounding space. The glass elevated floor was created purposley so that the light could shine up at the statue. The statue is hanging from the ceiling via thin strands ironic to the original which is placed on solid ground.
Space 4


The fourth space is a contrast to the three previous as I used a green vegetation texture, giving the impression that the statue has been placed in a garden.
Spaces 5 & 6


The last two spaces I wanted to create spaces which could be opposites of each other in a long section, that will read as one long space. This will correlate with the markers which will be placed in the two sides of a halved cube. This is depicted in my earlier sketches. I applied textures that would reflect each other and placed more light on one side of the space the "bright" side. I is almost depiction of good and evil that was sought of the idea that I had in my head when creating the two spaces one side; good represent peacefulness and tranquility and the other violence and unruliness.
These spaces that I created I tried to make all different and unique portraying different feeling and emotion. The next step after creating these spaces was to export them as 3ds files so that I could bring them into BuildAR so that they could be viewed in augmented reality.
AUGMENTED REALITY
The first process of the augmented reality part is to create markers for all the individual spaces which I want to display in BuildAR. I kept the markers simple but still informative to make sure they are picked up by the camera in BuildAR and associated with the correct model. Below are the markers which I will be using..


 |
| This is for Space 5 |
 |
| This is for Space 6 After creating the markers the next stage was placing them according to how they are going to be displayed in BuikAR. I had decided to place them onto a cube which can be moved, rotated to view all the spaces. Below are some images of the cube and how it will work...      The next step now is to load the appropriate model files and markers into BuildAR and start viewing the model in augmented reality. Below a screen shots of my models in BuidAR.. I uncounted some problems when bringing it into BuildAR the biggest one being the textures and lighting did not come in with the 3ds file export. I was very disappointed with the way it cam out because my models relied on their textures and lighting. This is something I definitely want to resolve with the tutors when I get back. Besides form that the models came in but I was very disappointed with the they way they cam in. I would have loved for them to have looked like the renders.     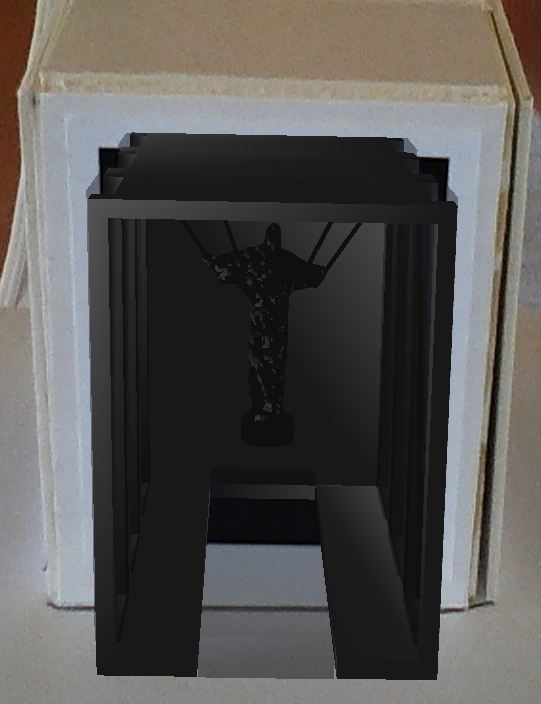     Below are some videos that I created... |
